Inside: Fuel your kids’ excitement and creativity this Easter with these seven fun Easter egg decorating ideas that are fun and easy to make even for small kids and special children. Enjoy this special bonding with your family.
From the living room, we grown-ups could feel the excitement of the kids outside on the balcony of our host for the Easter party. It was pinata time and the kids lined up to hit the pot with goodies. There were oohs and aahs after each kid had their turn. And finally, someone hit it hard and the candies, chocolates, and coins scattered all over the floor. Everybody scampered to collect the giveaways. The children were all smiles, of course as they put their sweets and/or coins in their pockets or Easter baskets.
Yeah, Easter is just around the corner. What excites you and your family about this special celebration? For sure, especially if you have young kids including a child with special needs, preparation starts weeks or days before the party. These would include what food to prepare, when to do grocery shopping, what chocolates to buy for giveaways, what decorations to put up especially if you’re the host of the celebration, what games to play, and the list goes on. I have found these seven fun Easter egg decorating ideas, easy-peasy ones that your special child can help with.
Thus, the whole family will be excited to put up beautiful decorations, like the Easter basket with the bunny, chocolates, Easter candle, the bunny headband, and of course the Easter eggs that we will decorate.
I’m sure you and your kids will enjoy making these Easter eggs. Of course, you cannot make all of them, but I have collected these so you can choose which are more fun and easy for your family or which idea will have materials readily accessible in your homes. What I can promise is that these Easter eggs will brighten your homes and your little ones including your special child will be delighted to help you with the decoration.
But wait, have you ever wondered….
Why do we celebrate Easter?
As Christians, we all know that Jesus died on the cross for us to be saved. He died for our sins. The crucifix that we see in the church and in our rosary beads depicts this significant event.
Three days after, Jesus was resurrected and came back from the dead. This is what we celebrate on Easter Sunday or Resurrection Sunday. It signifies hope and the great sacrifice of Jesus for his love for us.
I observe that this is really a big celebration for our churches. On Easter Sunday, the parishioners are in their best Sunday attire, the kids get their Easter baskets blessed by the priest, and everyone looks excited for their party after the mass.
Excited now to decorate your Easter eggs?
We will be using real eggs that need to be hard-boiled. Of course, we don’t want to get messy in case they break while you decorate them.
First things first….
How to boil the eggs
- Put the eggs in a large pot and add water to cover them with 1 inch of water.
- Bring the kettle to a boil and let it boil for 30 seconds.
- Turn off the heat and let the eggs sit in the pot for another 12 minutes.
- Remove the eggs from the pot and dunk them in ice water.
You can boil as many eggs as you want, the more decorated eggs you will scatter around your home, or put in your Easter basket, the more festive will your homes look for Easter!
By the way, have you ever wondered why we use eggs as decorations during Easter? They symbolize new life and rebirth, that is, Jesus’ resurrection.
Okey, let’s start with decorating! This is fun!
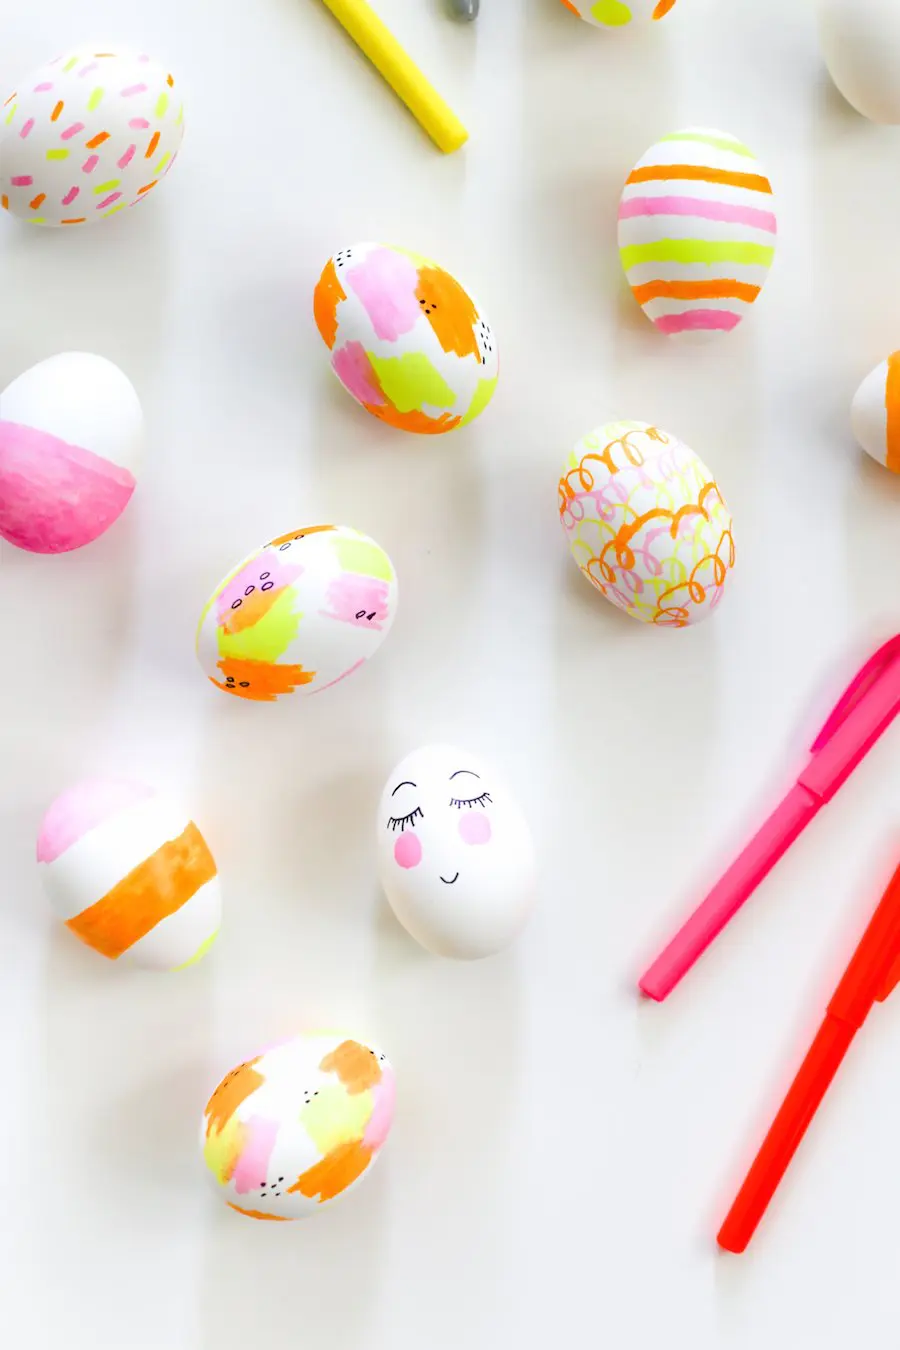
1. Highlighter Easter Eggs
- Materials- hard-boiled eggs, highlighters and markers ( various colors )
- Search from your drawers and your kids’ collections and grab as many colors of highlighters and markers as you want.
- You can do this even a day before the party or a few hours before as long as you know you have markers and highlighters.
- No artistic skill needed. You and your kid can draw any shapes-dots, stars, flowers, simple lines, curve and zigzag lines, swirls, or any simple figures like a doll’s head, or silly faces.
- Just let your special child do his own thing and I’m sure he’ll enjoy it!
- Be sure to appreciate his art!
2. Nailpolish Easter Eggs
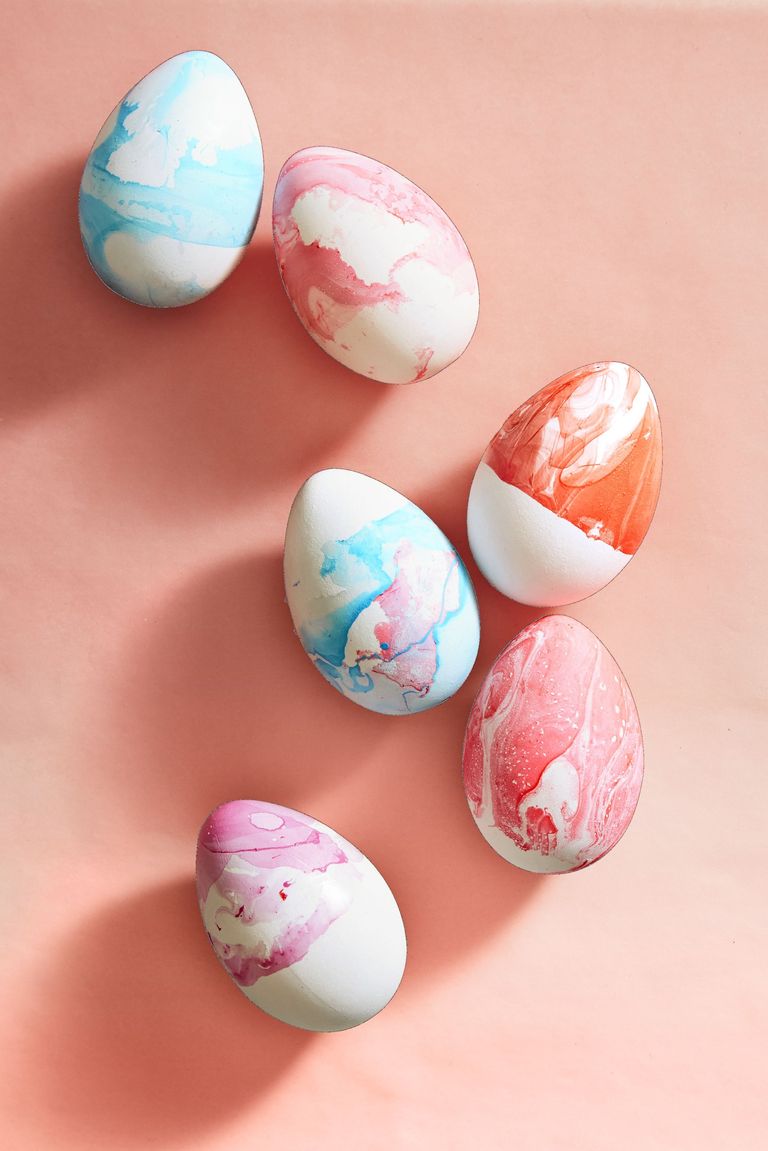
- Materials- hard-boiled eggs, nailpolish ( various colors ), water in a small basin or any small container for every color of nailpolish
- Swirl your nailpolish hue into water then dip the egg in.
- Use as many colors of nailpolish so you will have different hues.
- Try using 2-3 hues in one setting to have more colorful eggs.
- So easy to do that your special child will have fun dipping the eggs in.
3. Melted Crayon Easter Eggs
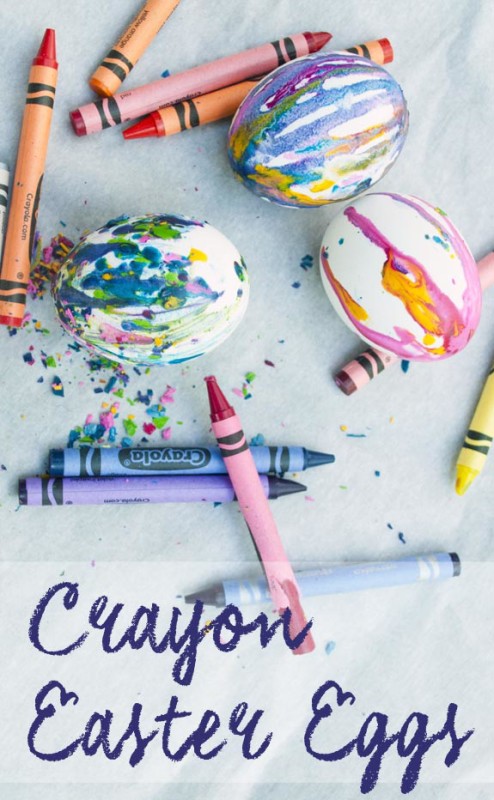
- Materials-hard-boiled eggs, old or new crayons ( various colors ), knife or old cheese shredder, paper towel, bottle caps ( as many as your boiled eggs )
- Prepare all materials first because your eggs need to be warm while decorating.
- You can use your kids’ old broken crayons or buy some if you have none.
- Make crayon shavings after removing part of the paper cover by using a knife or an old cheese shredder. Do this yourself to avoid cuts in your kids.
- Right after the eggs are hard-boiled, dry them with paper towel and let them stand in bottle caps.
- Sprinkle the crayon shavings on top of the hot eggs and let them melt.
- You can also put crayon shavings at the edges or bottom of the eggs .
- Let the eggs sit for a few minutes while the crayon shavings are melting, then remove the unmelted ones..
- You can also roll the eggs in crayon shavings for variation.
- This is so easy that your special child can help you with distributing the crayon shavings. Just tell him to be careful because the eggs should still be hot while doing this.
This post contains affiliate links. Read the full Affiliate Disclosure here.
4. Watermelon Easter Eggs
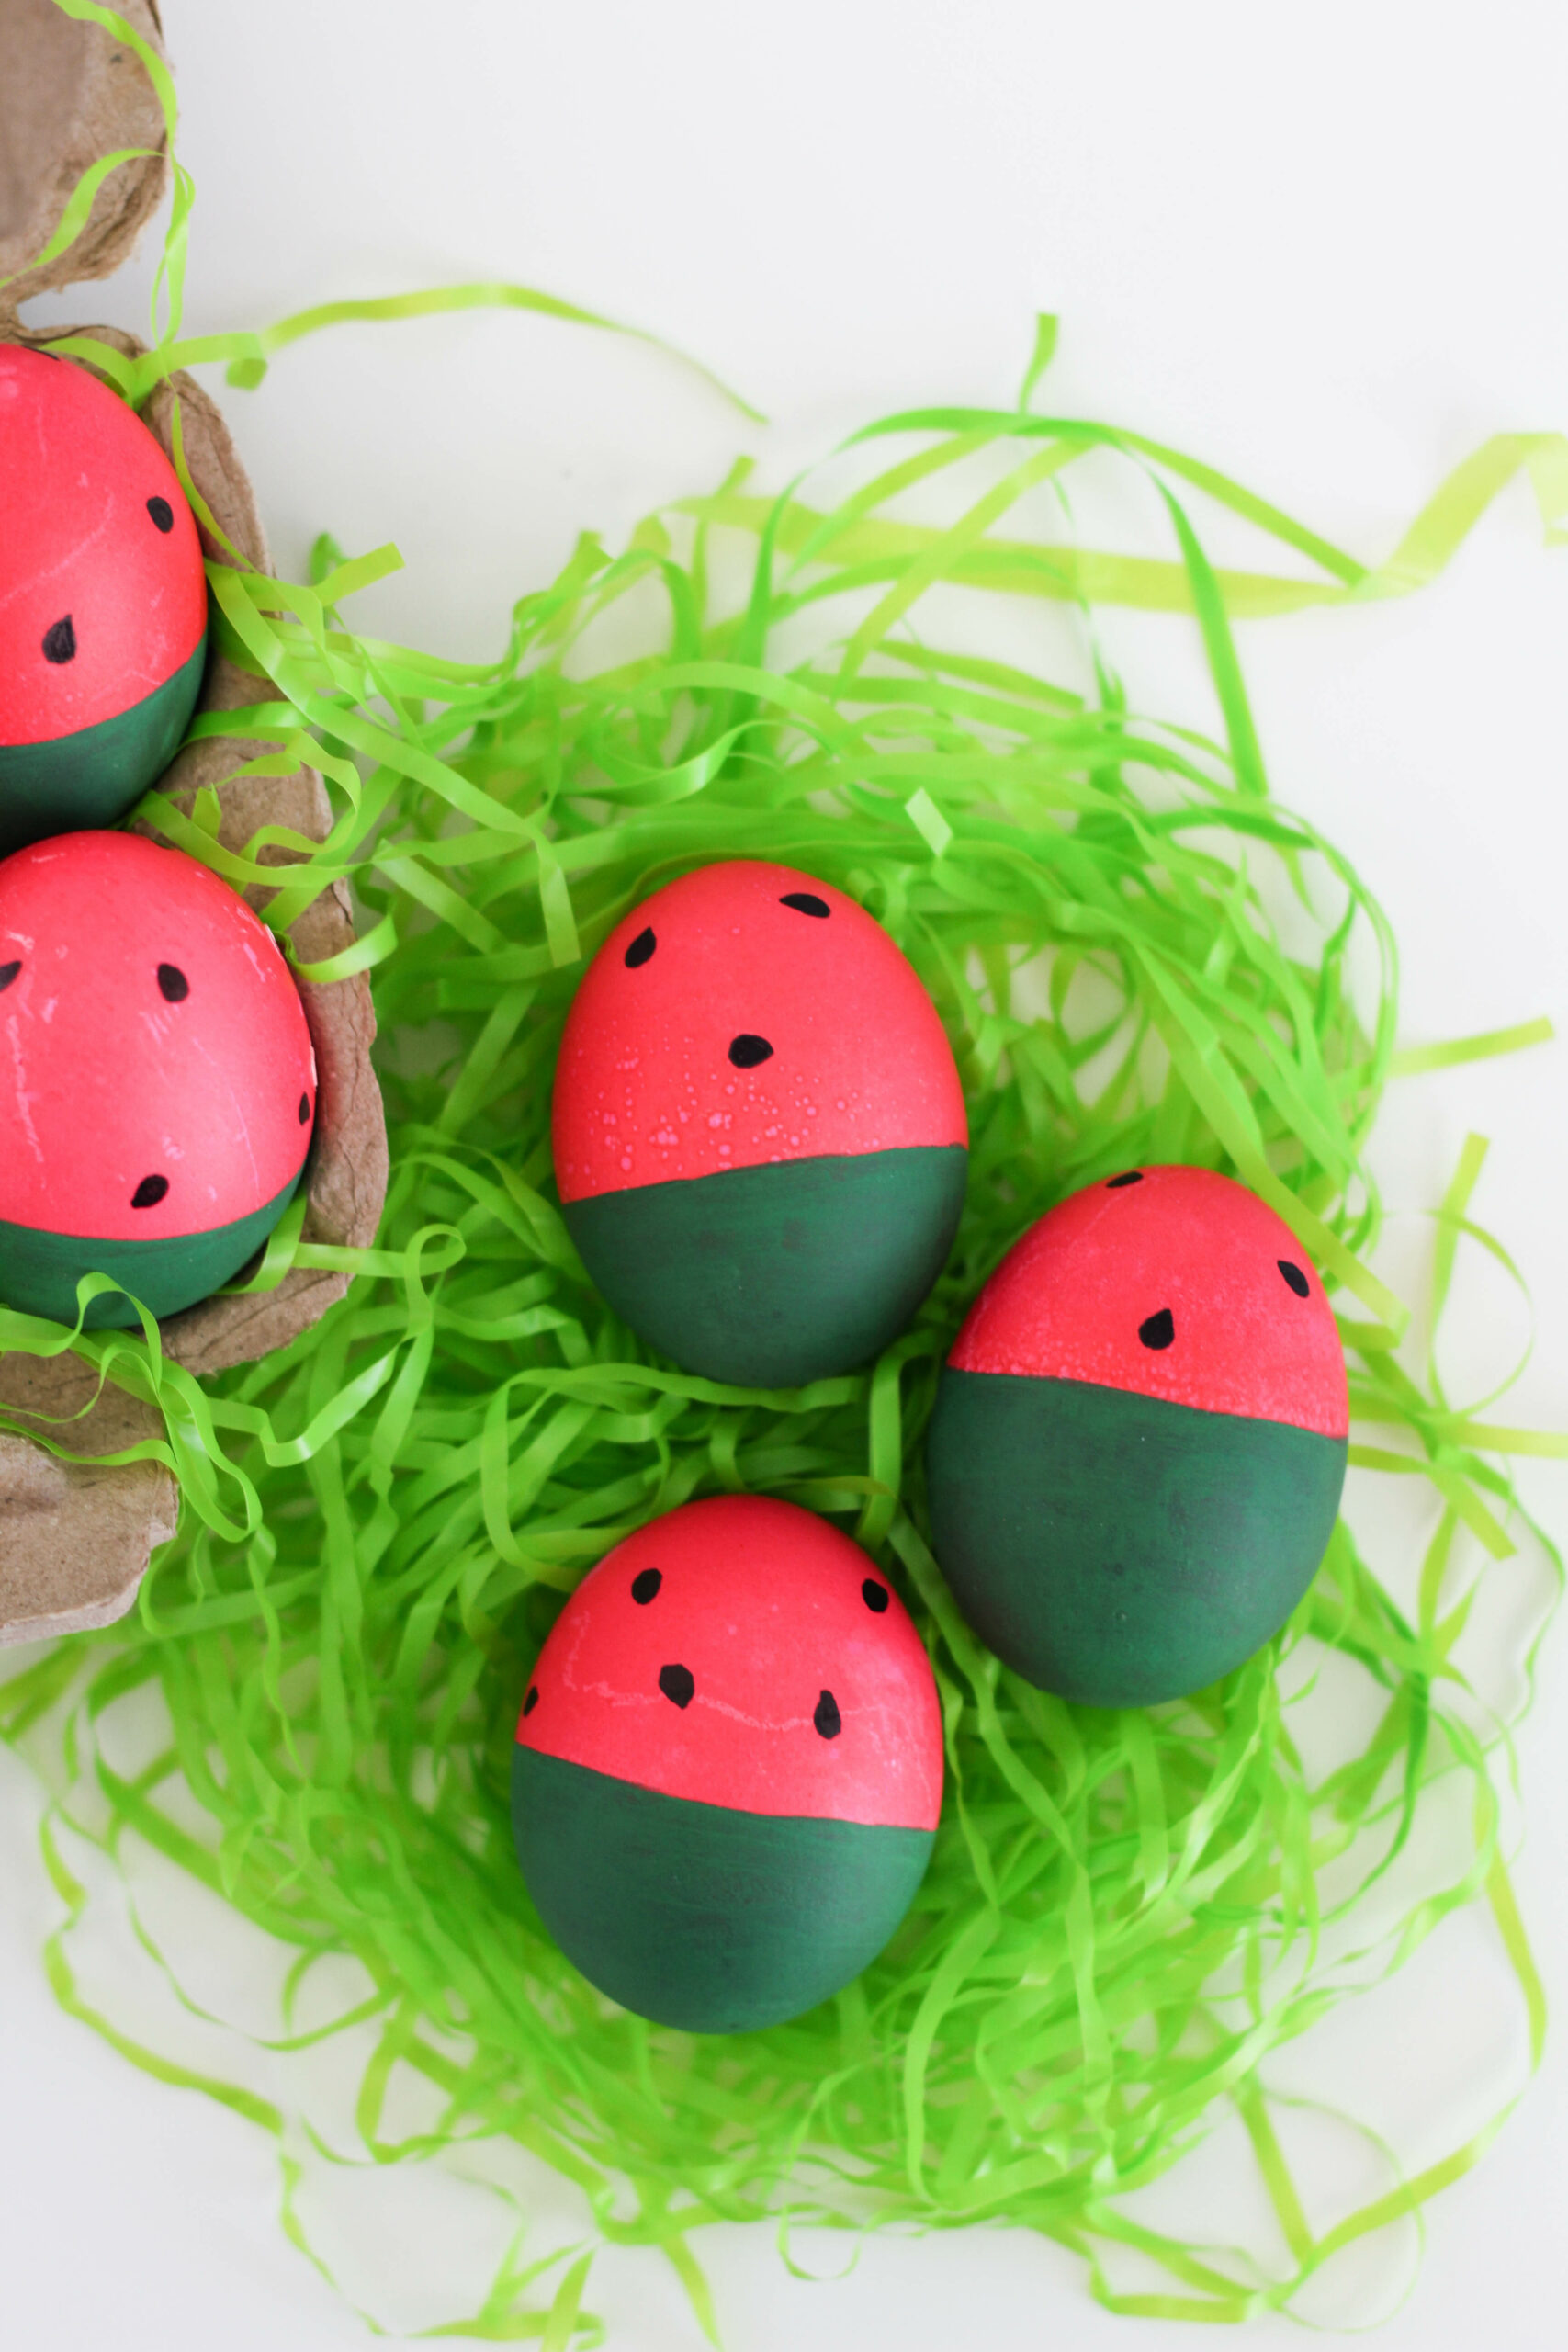
- Materials- hard-boiled eggs, red or pink egg dye, green craft paint, black sharpie, paper towel
- Start by dyeing the eggs with the red or pink egg dye. Coat entirely by letting the eggs sit in the dye for 5 minutes or longer until it is colored deep red.
- Remove the eggs then air-dry completely.
- Using the green craft paint, apply it at the bottom half of the eggs to make the ” rind. ” Allow it to dry and apply a second coat to make the color deeper.
- Let the eggs dry completely.
- Draw little circular or oblong ” seeds ” onto the red or pink part of the eggs using the black sharpie.
- Voila! It will feel ” summery ” just looking at your watermelon Easter eggs.
- You can definitely let your special child help you by letting him arrange the eggs in some paper towel to dry after applying the dye or let him apply the green paint with your supervision as well let him draw some little circles in the red/pink part of the eggs.
5. Minion Easter Eggs
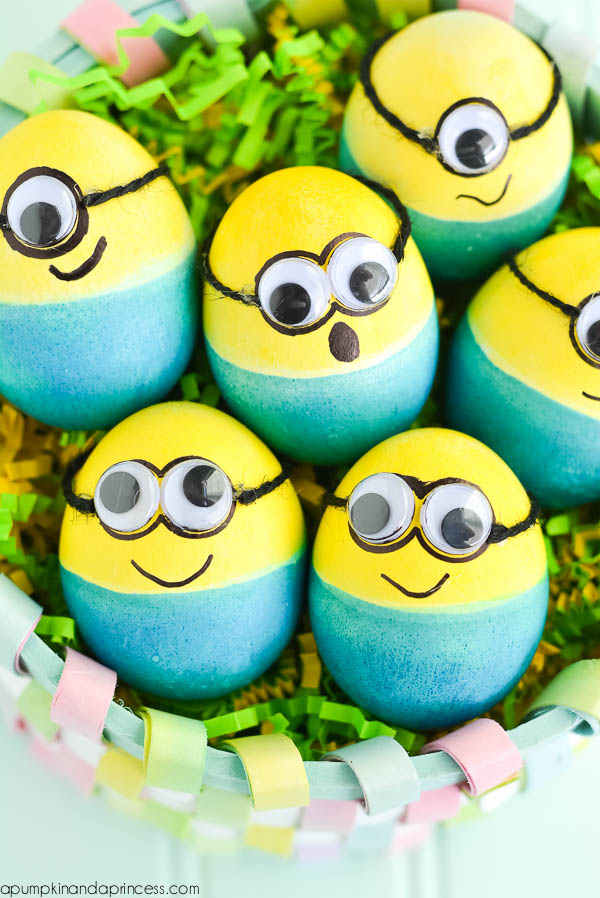
Ideas from A Pumpkin and a Princess
- Materials- Hard-boiled eggs, PAAS Egg decorating kits, moveable eyes, black string, sharpie pen, vinegar, glue
- Prepare the yellow and blue dyes in individual cups.
- Pour 2-3 tablespoons of vinegar into a cup and drop the dye tablet and let it dissolve completely.
- Then pour 1/4 cup of water at room temperature into the dye.
- Dip half of the egg into the yellow dye. Let it sit for around 5 minutes to have a deep color. Let dry completely.
- Dip the other half in the blue dye for another 5 minutes and dry completely.
- Attach the eyes with glue.
- Make the goggles by attaching the string around the egg from one side of the eyes to the other side.
- Use the sharpie pen to draw the mouth.
- Your special child will surely be amazed at your beautiful creation! Let him assist you as you make all these.
6. Straw-painted Easter Eggs
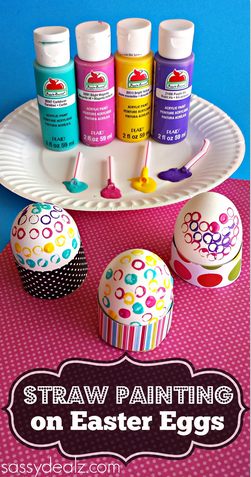
- Materials- hard-boiled eggs, straw, acrylic paint ( 4 different colors ), toilet paper roll holder, scrapbook paper, paper plate, glue
- Cut the straw into short pieces- 1 straw for each color of paint
- Cut the toilet paper roll holder into 2 inches each.
- Place the eggs in the toilet paper roll holder to let them stand.
- Put a little bit of each color of the paint in the paper plate.
- Let your kid dip the end of the straw to the desired color and press it on the egg, then rotate the egg and continue pressing the straw on the egg at the other sides, be sure to dip again the straw at the paint when the color becomes lighter.
- You can use all 4 colors in one egg, or 2 colors or the same color for each egg, whatever you prefer.
- Cut strips of scrapbook paper and glue to the toilet paper roll to finish your project.
7. Ice Cream Cone Easter Eggs
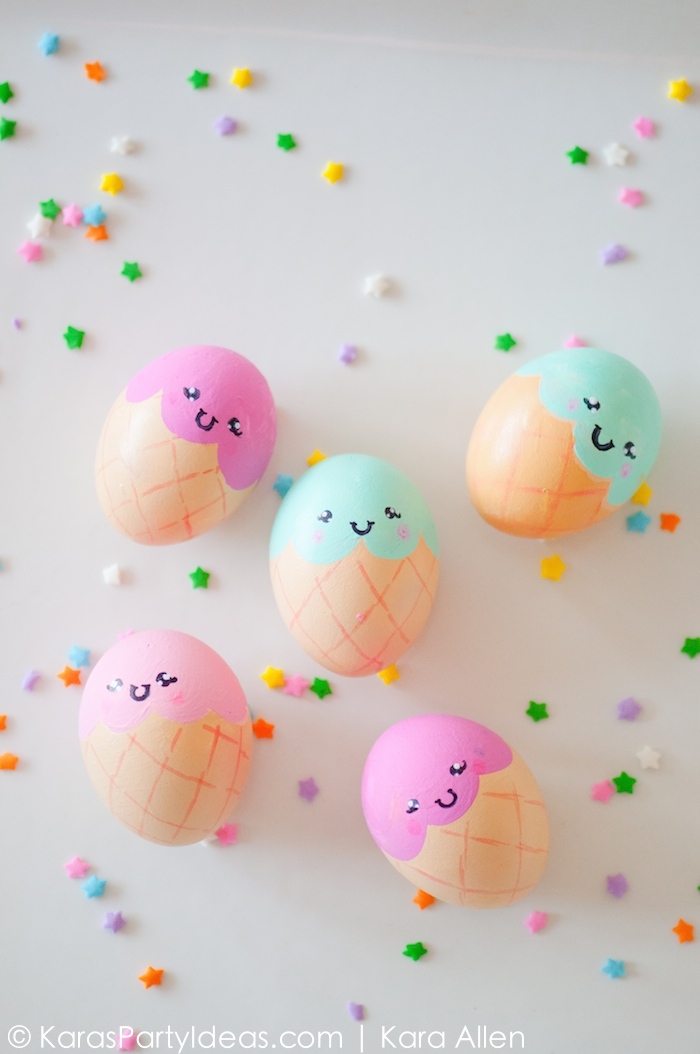
- Materials-hard-boiled eggs, acrylic paints ( various colors ), light pink marker, black sharpie
- Paint the eggs all over with a light tan color.
- Paint the top of the ice cream cone with another color of your choice, making little rounded scallops at the bottom edges.
- Draw “cone” lines on the cone part of the egg using a light pink marker.
- Using a black sharpie, draw a Kawaii face, if desired.
- Put small dabs of white paint for the eyes and pink paint for the cute little cheeks.
- Again, your special child can help you paint the light tan color for the eggs and the other colors for the top part with your supervision.
All of the concepts above are definitely easy to follow and I hope your special child will enjoy helping you decorate your Easter eggs.
If you want the materials put together already with instructions within, you can buy them from the Dollar store, or here. You can also order and choose from these amazing Easter egg decorating sets.
Watch the video below done by 3 kids and their mom ( in the background ) and learn other ideas from them.
Great Time for Bonding
Egg decorating for Easter is indeed one of the best times for you and your special one to spend quality time together. You will teach him those artistic skills as well as enhance his fine motor skills, and teach him to focus as well.
This is a family tradition that he will look forward to year after year, aside from participating in some simple games like egg hunting and other parlor games, should your family attend one of those bigger parties in the future.
Happy Easter everyone!
Which decorating ideas are you planning to do this year? Come back later and share your work of art or even your videos in the comment section below.
Originally published: April 4, 2020 Updated: March 11, 2024
